

How to Create a Diabetes Emergency Kit
Diabetes can bring sudden challenges, like low blood sugar or high blood sugar spikes. These moments need quick action. That is why learning how to create a Diabetes Emergency Kit is so important for everyone living with diabetes or caring for someone who does. This simple step can save time, reduce stress, and even save lives during power cuts, travel problems, illness, or natural disasters. In this easy-to-read guide, we explain everything in plain English. You will discover why you need one, what to put inside, and the exact steps to follow. We also cover family tips, travel ideas, and maintenance so your kit stays ready. By the end, you will feel confident and prepared.
How to Create a Diabetes Emergency Kit starts with understanding the risks. Blood sugar can drop fast if you miss a meal or take too much insulin. It can rise quickly during sickness or stress. Without supplies, these issues turn into big problems like confusion, fainting, or worse. A good kit keeps everything in one easy-to-grab place. Families in Agra or anywhere in India face hot summers, monsoon floods, or power outages. How to Create a Diabetes Emergency Kit gives peace of mind for these real-life situations. Many people say it feels like having a safety net. Doctors from trusted groups like the American Diabetes Association and CDC recommend it strongly.
Why do so many skip this? They think “it will never happen to me.” But emergencies do happen. A simple kit takes just one afternoon to build and costs a little extra. The best part? You can make it work for your exact needs—whether you use insulin, pills, a pump, or a CGM. This guide walks you through how to create a Diabetes Emergency Kit step by step. We keep language simple so anyone can follow, even kids or elders helping at home.
Why Everyone with Diabetes Needs This Kit
Living with diabetes means staying alert every day. But life throws surprises. A sudden storm knocks out power for hours. You get stuck in traffic and miss a meal. Or a family member falls ill, and you cannot reach the pharmacy. In all these cases, How to Create a Diabetes Emergency Kit becomes your best friend.
Low blood sugar (hypoglycemia) causes shakiness, sweating, and confusion. Without fast carbs or glucagon, it can lead to seizures. High blood sugar (hyperglycemia) with ketones risks diabetic ketoacidosis—dangerous and scary. A ready kit stops small problems from growing big. Families feel safer knowing supplies are close. Parents of children with diabetes especially love it because kids cannot always explain what they need.
How to Create a Diabetes Emergency Kit also helps during travel. Roads in India can be long, and shops may not stock your exact strips or insulin. With your kit, you stay in control. Experts say one week of extra supplies is smart. Some aim for two weeks. This planning reduces worry and lets you focus on daily life instead of “what if.”
Real stories show the value. One family in Uttar Pradesh kept their kit ready during a flood. They could test blood sugar and treat lows even without electricity. Another person used it on a train delay and avoided a hospital visit. These moments prove that ” How to Create a Diabetes Emergency Kit is not extra work—it is smart living.
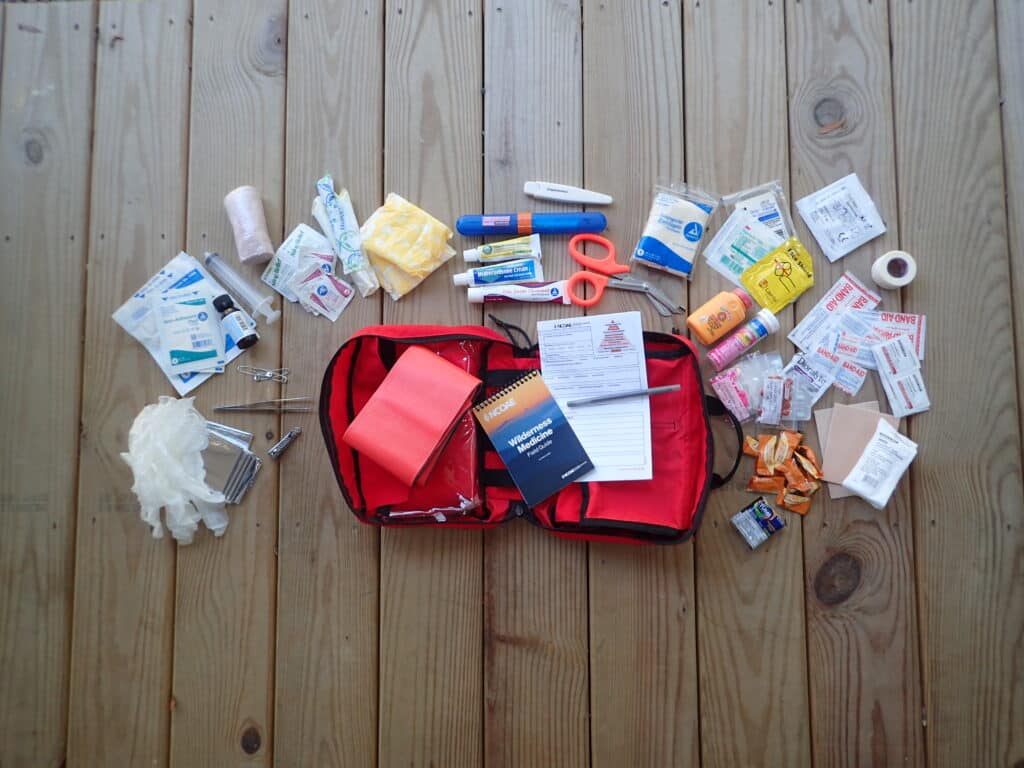
Essential Items to Include When You Learn How to Create a Diabetes Emergency Kit
The heart of any kit is the right supplies. Here is a clear list based on advice from diabetes experts. Pack enough for at least 7–14 days. Keep everything in a waterproof, easy-to-carry bag or small backpack.
- Medical Information Papers Write or print: your diabetes type, all medicines with doses, allergies, past surgeries, doctor contacts, pharmacy details, health insurance card, recent lab results (like A1C), and two emergency family contacts. Add a letter from your doctor listing your current plan. This helps strangers help you fast.
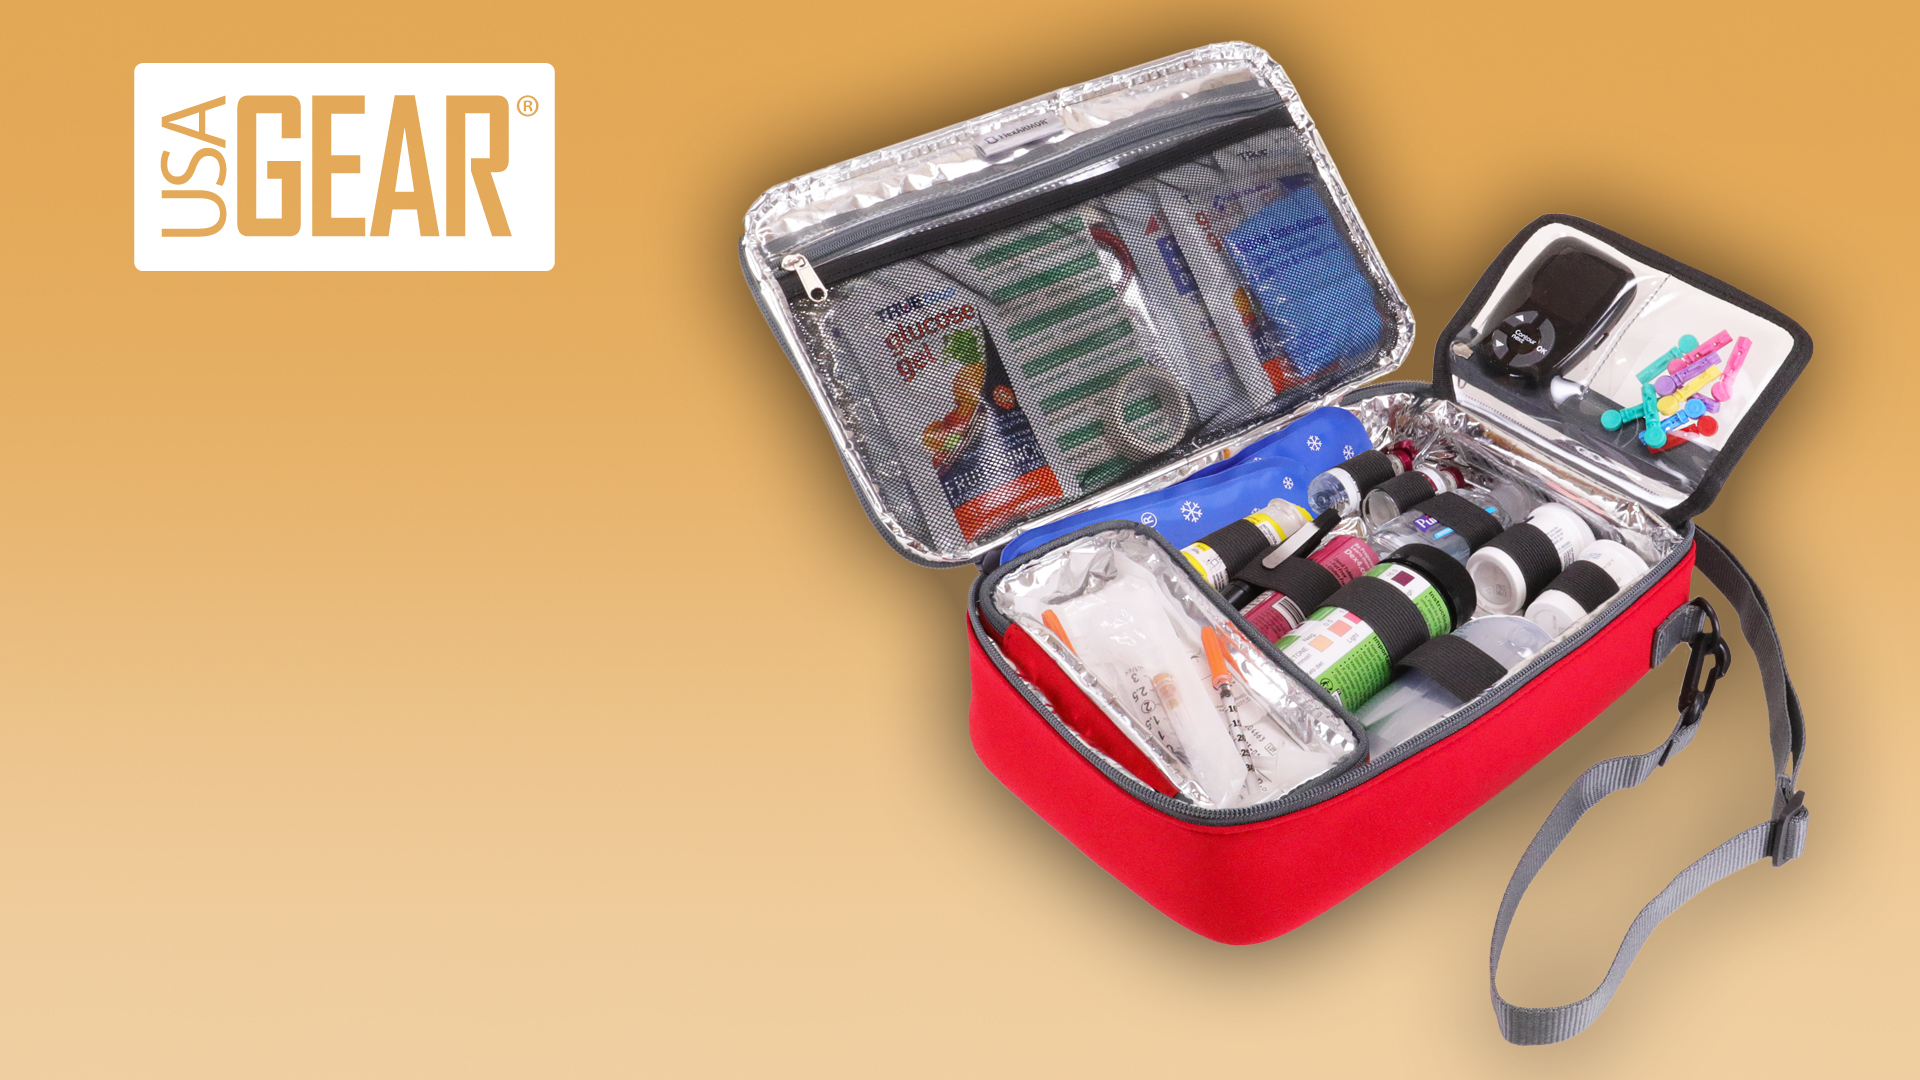
- Medicines: Extra insulin (vials or pens) or oral pills. Include glucagon if your doctor prescribed it for severe lows. Pack syringes, pen needles, or pump supplies. Always check expiry dates.
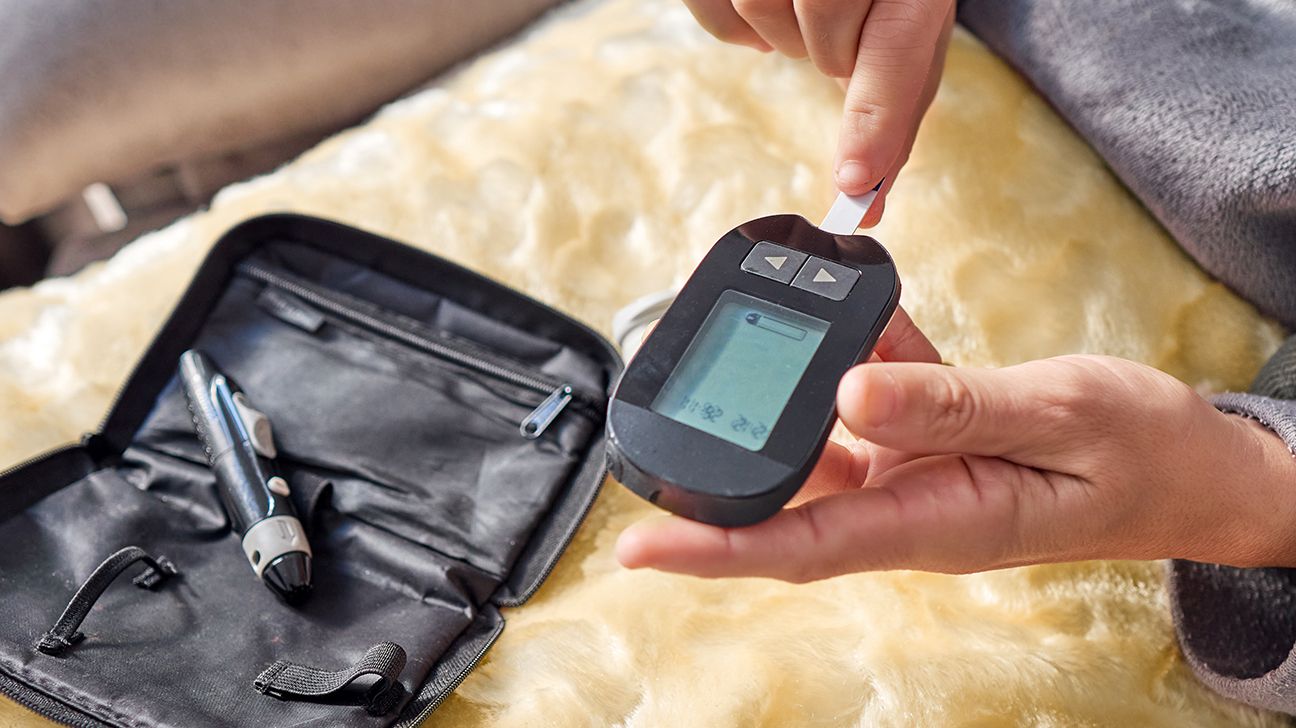
- Blood Sugar Testing Tools Glucose meter (extra one is better), plenty of test strips, lancets, and batteries. If you use a CGM, add extra sensors and transmitters. Alcohol wipes keep things clean.
- Ketone Testin:g Ketone strips or meter. High blood sugar plus ketones needs quick doctor help.
- Fast Carbs foLowws Glucose tablets, small juice boxes, regular soda, honey packets, or hard candy. Keep 15-gram portions easy to grab. These raise sugar in minutes.

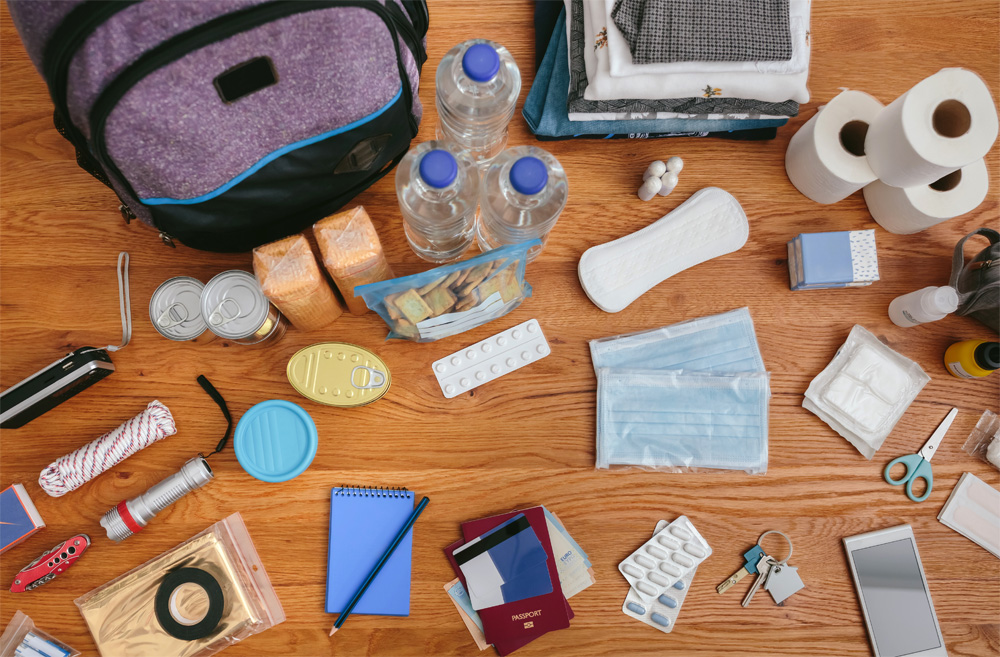
- Food and WWaterr Two-day supply of non-perishable snacks like peanut butter crackers, nuts, protein bars, or dried fruit. Three-day supply of bottled water. Choose items your family likes and that fit your diet.
- Cooler for Insul: a small insulated bag with reusable gel packs. Never use dry ice—it can freeze medicine. Insulin stays safe between 2–8°C or room temperature for short times.

- Sharps Safe: ty Empty plastic bottle or small sharps container for used needles.
- First AidBasicss:ics Bandages, cotton swabs, antibiotic cream, and hand sanitizer. Add anti-nausea or anti-diarrhea medicine if your doctor approves.
- Other Helpful Things: Flashlight with extra batteries, phone charger, notepad and pen to log readings, extra clothes and socks, cash in small notes.
How to Create a Diabetes Emergency Kit means choosing a strong container first. A clear plastic box or waterproof backpack works well. Label it “Diabetes Emergency Kit” in big letters so anyone can find it fast.
Step-by-Step Guide: How to Create a Diabetes Emergency Kit at Home
Follow these easy steps today. It takes less than two hours.
Step 1: Gather all items from the list above. Check expiry dates and replace anything old.
Step 2: Choose your bag. Make it waterproof and lightweight. Many people use a small backpack that they can carry easily.
Step 3: Put papers in a sealed plastic bag so they stay dry.
Step 4: Pack medicines and testing supplies together. Keep insulin in the cooler section.
Step 5: Add fast carbs and snacks in a separate pocket for quick access.
Step 6: Include first aid, flashlight, and charger.
Step 7: Show the finished kit to your family. Tell them where you keep it and how to use each item. Practice together.
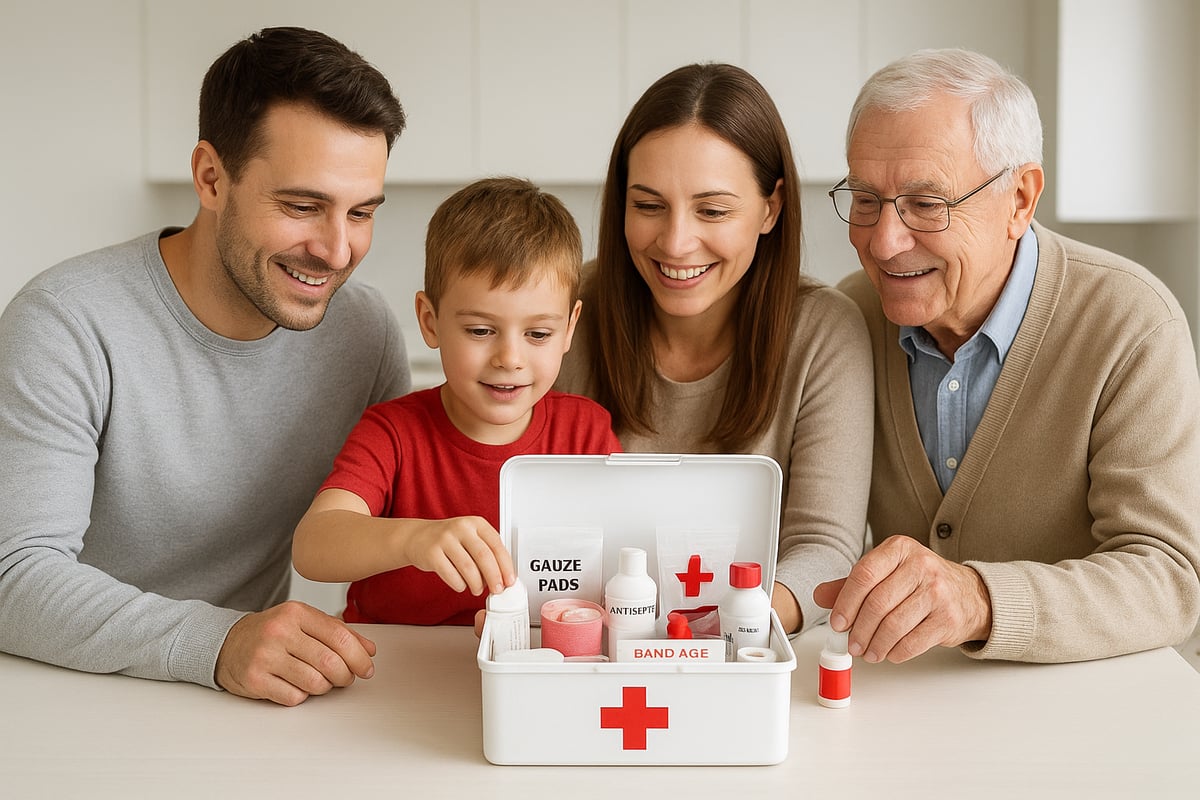
How to Create a Diabetes Emergency Kit feels simple once you start. Many families turn it into a weekend project. Kids can help label bags or count tablets. This builds confidence for everyone.
Customizing Your Kit for Different Needs
How to Create a Diabetes Emergency Kit changes a little depending on your life.
- For Type 1 Diabetes: Focus more on insulin, glucagon, and pump or CGM backups.
- For Type 2 on Pills: Add extra oral medicines and fewer injection items.
- For Children or Families: Use colorful labels, favorite snacks, and teach kids simple steps like “grab glucose tabs first.”
- For Travel or Car: Make a smaller “go-bag” version that fits in your vehicle. Add motion sickness tablets if needed.

- For Home Disasters: Keep a larger kit near the door with more water and food.
People who travel a lot keep one kit at home, one in the car, and one in their daily bag. This way, you are never without supplies.
How to Maintain and Update Your Kit
A kit is useless if supplies expire. Check every three months. Replace used or old items right away. Keep a checklist inside the bag so you know what to buy. Store the kit in a cool, dry place away from direct sunlight. Tell family members to check it too.
During doctor visits, ask for extra prescriptions for emergency supplies. Many pharmacies help with “disaster stock.” In India, keep extra supplies during festival seasons when shops may close.
How to Create a Diabetes Emergency Kit is not a one-time job. It is ongoing care, like brushing your teeth. Regular checks keep it fresh and ready.
What to Do in a Real Emergency Using Your Kit
Open the kit calmly. Check blood sugar first. Treat lows with 15 grams of fast carbs and recheck after 15 minutes. For highs, follow your sick-day plan and drink water. Use glucagon only if the person cannot swallow and is unconscious—follow the instructions exactly. Call emergency services if needed. Your medical papers help doctors act fast.
Practice these steps with family during quiet times. Role-play different situations. This makes real moments less scary.
Involving Your Family in Creating a Diabetes Emergency Kit
Diabetes affects the whole family. How to Create a Diabetes Emergency Kit is a team project. Sit together and explain why each item matters. Let children help pack snacks or draw labels. Spouses or parents can learn to give glucagon or check blood sugar. Grandparents feel useful when they know the plan.
Families who build the kit together talk more openly about diabetes. It reduces fear and builds support. Keep the kit in an easy spot everyone knows—like the cupboard near the kitchen or car trunk. Update it as a family every few months. This simple habit strengthens bonds and keeps everyone safer.
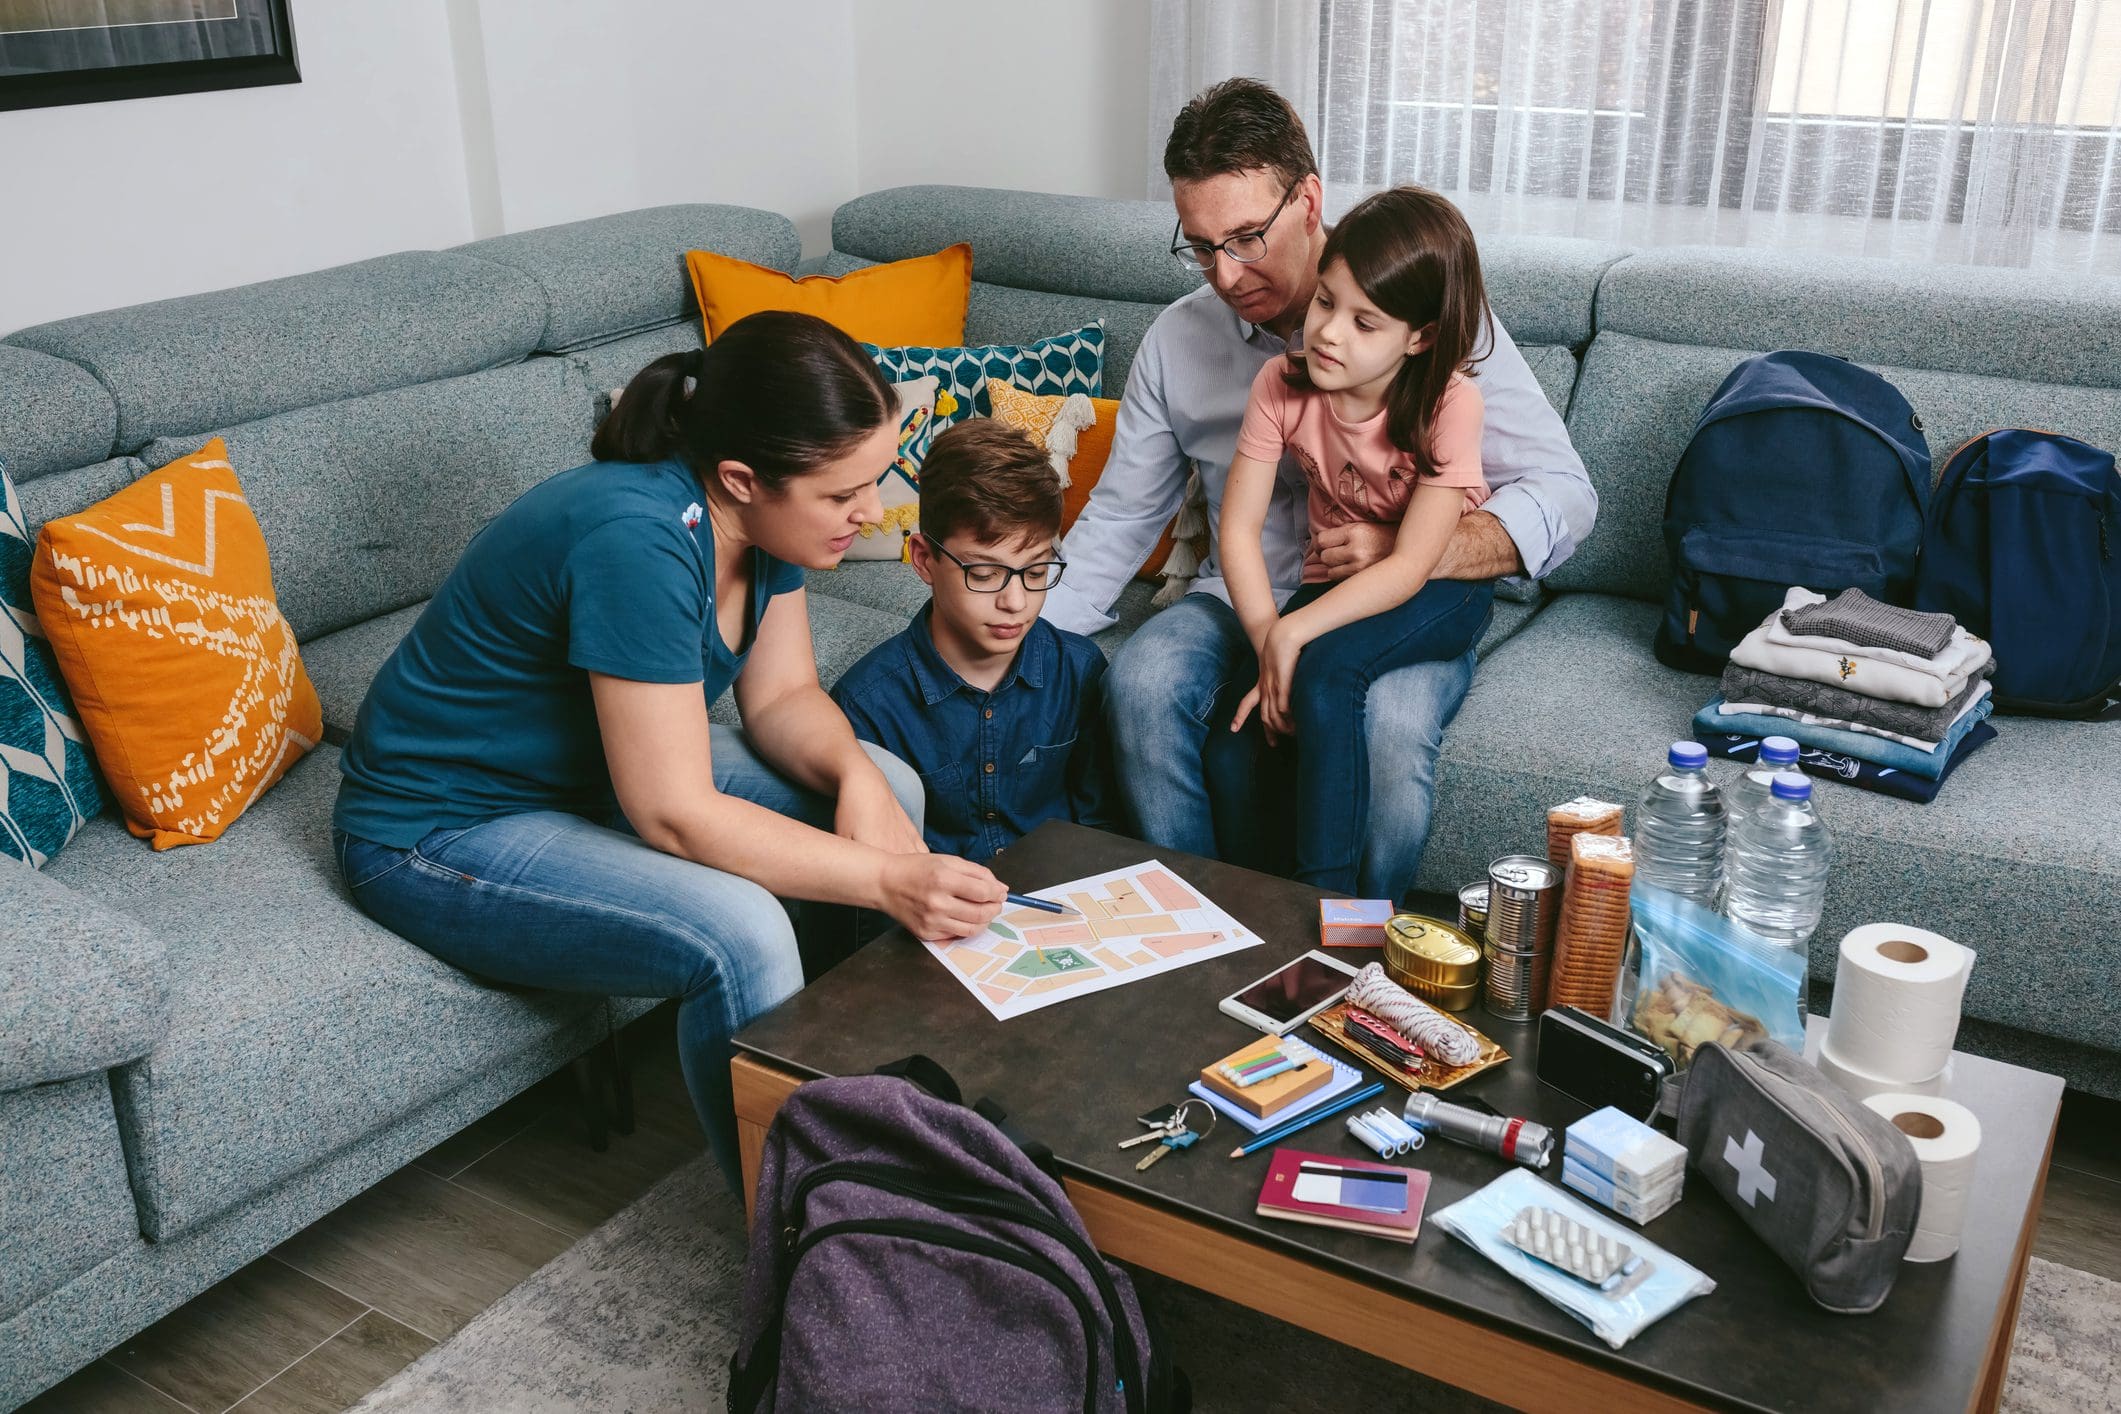
Many families in India share one big kit at home and smaller ones for school or work bags. This works well for joint families where multiple people may help.
Common Mistakes to Avoid
Do not pack only one meter—batteries die. Never freeze insulin. Do not forget water or sharps safety. Avoid sugar-free candy for lows. Check everything regularly. Do not hide the kit; everyone must know where it is.
How to Create a Diabetes Emergency Kit correctly means thinking ahead and avoiding these easy errors.
Benefits You Will Notice
Peace of mind is the biggest win. You sleep better knowing you are ready. Travel feels freer. Family worries less. In a crisis, you act instead of panicking. Many people say their kit helped them avoid hospital stays. It also teaches children responsibility and care.
Final Thoughts on How to Create a Diabetes Emergency Kit
You now know exactly how to create a Diabetes Emergency Kit. Start small today—gather papers and one extra day of supplies. Build it step by step. Involve your loved ones. Check it often. This one project can change how you live with diabetes. It turns fear into confidence.
Remember, small actions today protect big tomorrows. Share this guide with friends or family who need it. Stay safe, stay prepared, and keep your blood sugar steady.
Disclaimer: This article is for general information only. It is not medical advice. Always talk to your doctor or diabetes educator before making changes to your supplies or plan. Every person’s diabetes is different. Follow your personal treatment plan. In an emergency, call your local doctor or hospital immediately. Check expiry dates and store items safely. We are not responsible for any health outcomes.
FAQs
- How often should I update my diabetes emergency kit? Check every 3 months and replace expired items right away.
- What is the most important item in How to Create a Diabetes Emergency Kit? Fast-acting carbs and your blood sugar meter come first for quick action.
- Can I make a smaller kit for daily travel? Yes! Many people keep a mini version in their bag or car with a meter, strips, glucose tabs, and insulin.
- Does my family need to know how to create a Diabetes Emergency Kit? Absolutely. Teach them where it is and the basic steps so they can help you.
- What if I use an insulin pump? Add extra pump supplies, batteries, and backup syringes in case the pump fails.
- How much water should I pack? At least 3 days’ supply for drinking and cleaning.
- Are glucose tablets better than juice? Both work, but tablets are easy to carry and do not get spoiled.
- Where should I store the kit at home? In a cool, dry, easy-to-reach place, everyone knows.
References
- American Association of Clinical Endocrinologists (AACE) Diabetes Emergency Checklist.
- American Diabetes Association – Patient Preparedness Plan.
- Centers for Disease Control and Prevention (CDC) – Diabetes Care During Emergencies.
- Children with Diabetes – Emergency Kit Guide.
- Byram Healthcare and other expert sources on diabetes supplies.
Stay prepared and healthy!


